Posts

    Monday, 30 September 2024

    Magic Cauldron: Harry Potter Themed Gender Reveal Party

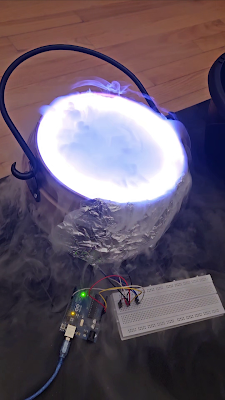
    Earlier this year, we had a very fun filled Harry Potter themed gender reveal party. For the reveal, I built a Magic Cauldron which would reveal the gender. Check it out for yourself!

    For this I needed:

    1. A Cauldron.
    2. WS2812B LED array.
    3. Aurdino UNO.
    4. Bread board and jumper wires.
    5. Dry ice.
    6. Kasa Smart bulbs

    I will go over in the following sections
    1. The Mist.
    2. Serial Bus.
    3. LED orchestration.
    4. Room effect.

    The Mist

    Dry Ice is solid carbon dioxide which is at a very low temperature of -78.5°C. When put in water at room temperature, it rapidly sublimates to create the fog/ mist effect. The hotter the water, the denser the mist and the quicker the effect occurs. So, it is important to have a balance - I preferred to have water heated up for 10s in microwave before I began. To prevent the mist from spreading too far, place the water in a smaller bowl inside the cauldron.

    Make sure to get the dry ice the same day as the event if you don't have the means to store it. Even when stored in the freezer, you will lose a lot it through sublimation. Always handle dry ice with care—never touch it with bare hands, as it can cause instant frostbite—and keep it out of reach of children.

    Serial Bus

    The serial bus acts as a communication channel between my computer and the Arduino via a wired connection. 
    We didn’t know the baby’s gender, and neither did anyone else. The plan was to have a trusted person open the envelope and provide the answer to start the reveal!
    Enter mode: b: boy, g: girl, d: dry run: 

    I used the serial bus to relay this information to the Aurdino.  


    LED orchestration

    I used a WS2812B LED array with 60 individually addressable LEDs, controlled through the FastLED.h library. The possibilities of what you can create with it are only limited by your imagination.

    There were 4 stages to the reveal build up 

    1. Lightning 

    • Every LED has 50% probability of turning on or off.
    • Random delay between 10 and 100ms before all LEDs are turned off
    • Random delay between 10 and 100ms before we repeat till 10s 


    2. Brewing portion 

    • LEDs are green.
    • They are turned on in sequence before it resets with a delay.


    3. Exponential backoff 

    This is right before the big reveal so this builds up anticipation. This backfired on me as it made be very nervous 😆  

    • LEDs are white.
    • All LEDs are turned on at the same time before turning off after a delay.
    • This delay is reduced exponentially to build up the suspense till it reaches a minimum.

    It is hard to capture this in a video because of shutter speed being low on phone camera.


    4. Final reveal

    All the LEDs are turned on with blue for boy and pink for girl - initially with the same effect from (2) before it settles to one color.  


    Room Effect


    I purchased some smart bulbs from Amazon that could be controlled using command line. I set up two of them in the room, and after the cauldron reveal, the bulbs would light up blue for a boy or pink for a girl, illuminating the entire room in the chosen color.


    Conclusion

    As Harry Potter fans, this was a fun and exciting way for us to reveal our baby's gender. We hope it inspires and helps others who are looking to create a similar experience. You can checkout the whole codebase here (I hope I get to clean it up some day).

    Sunday, 22 September 2024

    Kakashi: The Copycat Robot

    In this post, I want to share about "Kakashi: The Copycat Robot"—a fun side project I built a few years ago. The name is inspired by the famous character from Naruto, Kakashi Hatake, also known as the Copycat Ninja.

    The goal of this robot was to mimic Kakashi's ability to copy movements—though, of course, in a more limited way. Check it out for yourself!

    Here are the things I used to build this:

    1. Aurdino UNO board.
    2. Max7219 8x8 LED
    3. 3D printed Pan and Tilt brackets (2x) 
    4. 4 servo motors
    5. Bread board and jumper wires.
    I will go through it in following sections:
    • The Sharinghan
    • Pan and Tilt motion 
    • Controller - Serial bus
    • Tracking algorithm

    The Sharinghan

    Of course, our Kakashi needs a Sharingan! For those unfamiliar, the Sharingan is the special eye that grants Kakashi his copycat abilities in Naruto.


    For this, I used a Max7219 8x8 LED. It has 5 pins which I connected as follows:

    • VCC - connect to 5V 
    • GND - connect to ground
    • DIN - data in ports.h 
    • CS - chip select ports.h 
    • CLK - clock ports.h 


    Then I found a led editor which I used to create a hex mapping of the sharinghan in different angles and wrote this code that loops around it. 


    Pan and Tilt

    Pan and tilt are the two motions using which you can basically cover any movement when used in combination. 


    I used two of these to mimic arm movements. Each one is made up of a pan and tilt bracket, which you can either 3D print or purchase pre-made from Amazon. I attached two servo motors to each bracket. I won't go into assembly details, as there are plenty of great tutorials available on how to put one together. 

    Each servo motor has 3 pins - 5V power, ground and control. I connected the four control cables to the following ports:


    I wrote a simple class to control the 4 servo motors and map it into pan and tilt actions. 


    Controller - Serial Bus

    The serial bus acts as a communication channel between my computer and the Arduino via a wired connection. I use it to control the 8x8 LED display and handle pan and tilt actions. This setup is flexible and has been useful in several other projects as well. 
    On the client side, I implemented a simple class that sends control messages. It also has the ability to record and playback actions—similar to how Kakashi copies techniques and reuses them.


    On aurdino, I receive these messages and do an appropriate action.


    Tracking Algorithm


    In this section, I'll explain how I mapped my real-world movements to control the robot's actions. There were three main requirements:

    1. Hand Tracking: The system needed to track my hand movements and map them to four angles, corresponding to the servo motors in the pan and tilt setup.

    2. Scale Invariance: It had to be scale-invariant, meaning I could start from any position and move freely, with the robot replicating the same actions regardless of where I started.

    3. Smooth Movements: The movements had to be smooth, taking into account the bandwidth limitations of the serial bus and the movement speed of the servo motors while being fault tolerant. 

    For hand tracking, I needed a model that could quickly provide hand landmarks while running efficiently on CPU/MPS (for Mac). Since high accuracy wasn't critical, I opted for the EfficientDet model via MediaPipe. You can find more details in the kakashi.py file.


    Once I have the hand landmarks, I extract three key pieces of information from each hand:

    1. Center of the Hand (landmark 0)
    2. Palm Height (difference between landmarks 5 and 0) — used to scale the coordinates.
    3. Average Position of Finger Tips (landmarks 4, 8, 12, 16, 20) — since not all fingers might always be visible.

    With the tracking data available for each frame, the next step is to map it to the pan and tilt actions, i.e., the four angles for the servo motors.

    A servo motor can move between 0 and 180 degrees. I set the motors to point forward at 0 degrees, and whenever the program starts, the motors reset to this position. The tracking data from the first frame (td₀) serves as the reference point.

    For each subsequent frame, we calculate the distance along the x and y axes relative to the reference frame. This distance is scaled based on palm height to maintain scale invariance. After scaling, the distance is normalized between 0 and 1, with a range of -3 to +3, and then converted into a corresponding angle between 0 and 180 degrees.

    Here is the code that does this:


    Then we put all this together and voila, we have the Kakashi: The Copycat Robot! 

    PS: Feel free to checkout the whole code on github (I hope I get to clean it up someday).

    Thursday, 8 August 2019

    Neural network inference pipeline for videos in Tensorflow

    Just as we saw a huge influx of images in the past decade or so, we are now seeing a lot of videos being produced on social media. The need to understand and moderate videos using machine learning has never been greater.

    In this post, I will show you how to build an efficient pipeline to processes videos in Tensorflow.  For simplicity, let us consider a Resnet50 model pre-trained on Imagenet. Pretty straightforward, using tf.keras.applications 


    Now, let us break it up to see what exactly is happening:
    1. We are loading the model with weights.
    2. We are reading an image and resizing it to 224x224.
    3. Do some preprocessing of the image.
    4. Run inference.
    5. Do some post processing. 

    If we want to do something similar for large videos, we need to have a pipeline that takes a stream of frames from the video, applies preprocess transformations, run inference of frames, unravel the inferences and apply post processing.

    We can see that doing all these in a sequence - frame by frame is clearly not the right thing as it is slow and inefficient. In order to tackle this, we will use tf.data.Dataset and run inference in batch.

    First, lets create a generator that can produce frames from a video:


    We will use the tf.data.Dataset.from_generator method to create a dataset object out of this.


    Now let us define a function which does resizing, normalization and other preprocessing steps that are required on a batch of frames. Then, using the batch operation on the dataset created above, create a batch of size 64. Map the preprocess method that we defined onto the batch in parallel on CPU as it is a CPU intensive task.


    It is important to make sure that I/O is parallelized as much as possible. For best performance, instructions that are well suited for CPU should run on CPU and the ones suited for GPU should run on GPU. Also, If you observe the code above, we are prefetching. What this means is that, before consuming the dataset, a batch of 64 frames are preprocessed and is ready for consumption. By the time we run inference on a batch of frames, the next batch is ready for consumption. This is very important because, it ensures that we utilize CPU, GPU, I/O at its highest potential. Here, we are prefetching one unit at a time; and for your usecase, you may prefetch a different size. I always run nvidia-smi to tune the batch size, number of workers, prefetching etc so that both CPU and GPU are always in use in my job.


    Let's put all of this together with running the actual inference:


    This is all good, but what if you have some post processing that can be parallelized on CPU? That will keep the GPU idle till it is processed. So, let's make the inference step a generator that is part of the pipeline and feeds to a second dataset object.


    I have used post processing to do things like writing to disk, data visualization, generating content etc that can be parallelized. This was a simple guide to design data pipelines for inference in Tensorflow. Here is the code to a sightly complicated architecture that generates a video output (observe how I pass on the original frame through the pipeline).


    More resources:
    https://www.tensorflow.org/guide/performance/datasets
    https://www.tensorflow.org/beta/guide/data 

    Wednesday, 13 June 2018

    Finding Where's Waldo using Mask R-CNN

    When I was a kid, I really loved solving Where's Waldo. There were few books (it used to be called Where's Wally) in our school library on which I spent hours finding Waldo. For people who do not know what it is, basically Waldo - a unique character is hidden among hundreds of other characters and you have to find him in all the chaos in the image.

    Now that I am too old to be solving it and too busy to spend hours on such things, I decided to build a system that uses deep learning to automatically solve it and spent weeks to build it. 

    I started off by treating this like a classification problem with two classes - Waldo and not Waldo, similar to Hot dog - not Hot dog . Once we can get the classification problem successfully solved, we can just apply a classification action mapping (CAM) layer to find Waldo's activations in the image and thus finding Waldo. However I couldn't find enough images of Waldo. I found this repo which has about 20 images. And as there are only 20 Waldo vs thousands of not-Waldo characters, there is very high imbalance in the classes. I still tried though. But the results weren't that great.

    When I looked if someone has already worked on it, I found a medium post which used Tensorflow's Faster R-CNN model to do this. But I didn't want to just find bounding boxes, I wanted to actually mask out Waldo in the image. But I got more images of Where's Waldo from it.

    Then I came across this paper on Mask R-CNN which sounded promising for this usecase. And it was indeed much better than my earlier approach:


    Waldo masked out in the image

    Original Image

    In this post I would like to share how I was able to get the data, tag it and train a model to be able to solve Where's Waldo. You can checkout my code on github here.

    Fork deepwaldo on Github

    Mask R-CNN 


    The main idea here is to:

    1. Take the input image and pass it into a set of convolutional layers that sort of generates a feature map for the given image.
    2. Now, you take this feature map and pass it into a region proposal network which generates rectangular regions that say that for the set of final classes, we might have an image in this region. This will have its own classification loss (rpn_class_loss) and bounding box loss (rpn_bbox_loss).
    3. Now you take these regions and pass it into a ROI pooling layer using something like non-max-suppression.
    4. The regions are then reshaped and passed on to set of convolution layers which predict if there is an object in them or not. This again will have its own classification and bounding box losses. 
    5. Now, you have a separate convolution layers which predicts, for every pixel in the bounding box predicted, is it the given class or not. This essentially gives the mask required. Here in addition to the bounding box and classification losses, we also have mask loss.
    6. You run all these networks together backpropogating all the losses.
    If you want a more clear explanation, checkout the lecture in CS231n


    Mask R-CNN arch from CS231n (In this case we have a 28x28 mask instead of 14x14)


    Data


    As I mentioned earlier, I got 20 images from this repo and few more images from the medium post that used Faster R-CNN.  So,  a total of 29 images. I split this into 26 for training and 3 for validation. Then I used the via-via tool (used to tag VGG) to manually draw masks over Waldo in every image.  You can find the images and annotations in my github repo here.


    Training


    I trained the model for 30 epochs with 100 steps per epoch. The losses on tensorboard:


    If you want to train on your own dataset, first set your configurations in the waldo_config.py file or use the default.

    This will download the Mask-RCNN model trained on coco dataset to the MODEL_DIR folder and trains a model with the data in the DATA_DIR folder.
    python train.py
    For prediction, you can do the following which shows a popup with waldo detected in the image.

    python predict.py [MODEL PATH] [PATH TO IMAGE]
    # for example
    python predict.py models/logs/waldo20180612T1628/mask_rcnn_waldo_0030.h5 data/val/5.jpg

    In conclusion, the Mask R-CNN algorithm works fairly well to find Waldo for cases where it has already seen similar type of waldo image. Also, it looks like it works much better when the image quality is good and waldo is clearly visible. But I think it is still great since we only had a very tiny training data to train on.


    Tuesday, 23 January 2018

    Higher level ops for building neural network layers with deeplearn.js

    I have been meddling with google's deeplearn.js lately for fun. It is surprisingly good given how new the project is and it seems to have a sold roadmap. However it still lacks something like tf.layers and tf.contrib.layers which have many higher level functions that has made using tensorflow so easy. It looks like they will be added to Graphlayers in future but their priorities as of now is to fix the lower level APIs first - which totally makes sense.

    So, I quickly built one for tf.layers.conv2d and tf.layers.flatten which I will share in this post. I have made them as close to function definitions in tensorflow as possible.

    1.  conv2d - Functional interface for the 2D convolution layer.

    Arguments:
    • inputs Tensor input.
    • filters Integer, the dimensionality of the output space (i.e. the number of filters in the convolution).
    • kernel_size Number to specify the height and width of the 2D convolution window.
    • graph Graph opbject.
    • strides Number to specify the strides of convolution.
    • padding One of "valid" or "same" (case-insensitive).
    • data_format "channels_last" or "channel_first"
    • activation Optional. Activation function which is applied on the final layer of the function. Function should accept Tensor and graph as parameters
    • kernel_initializer An initializer object for the convolution kernel.
    • bias_initializer  An initializer object for bias.
    • name string which represents name of the layer.
    Returns:

    Tensor output.

    Usage:

    Add this to your code:

    2. flatten - Flattens an input tensor.


    I wrote these snippets while building a tool using deeplearnjs where I do things like loading datasets, batching, saving checkpoints along with visualization. I will share more on that in my future posts.

    Thursday, 11 January 2018

    Hacking FaceNet using Adversarial examples


    With the rise in popularity of face recognition systems with deep learning and it's application in security/ authentication, it is important to make sure that it is not that easy to fool them. I recently finished the 4th course on deeplearning.ai where there is an assignment which asks us to build a face recognition system - FaceNet. While I was working on the assignment, I couldn't stop thinking about how easy it is to fool it with adversarial examples. In this post I will tell you how I managed to do it.

    First off, some basics about FaceNet. Unlike image recognition systems which map every image with a class, it is not possible to assign a class label to every face in face recognition. This is because one, there are way too many faces that a system should handle in the real world to assign class to each of them and two, if there are new people the system should handle, it can't do it. So, what we do is, we build a system that learns similarities and dissimilarities. Basically, there is a neural network similar to what we have in image recognition and instead of applying softmax in the end, we just take the logits as embedding for the given image input and then minimize something called the triplet loss.  Consider face A, we have a positive match P and negative match N. If f is the embedding function and L is the triplet loss, we have this:

    Triplet loss

    Basically, it is incentivizing small distance between A - P and large distance between A - N. Also, I really recommend watching Ian Goodfellow's lecture from Stanford's CS231n course if you want to know about adversarial examples.

    Like I said earlier, this thought came to me while doing an assignment from 4th course from deeplearning.ai which can be found here and I have built on top of it.  The main idea here is to find small noise that when added to someone's photo although causing virtually no visual changes, can make faceNet identify them as the target.


    Benoit (attacker)
    Add noise
    Kian
    Kian Actual (Target)

    First lets load the images of the attacker Benoit and the target Kian.


    Now say that the attacker image is A` and the target image is T. We want to define triplet loss to achieve two things:

    1. Minimize distance between A` and T
    2. Maximize distance between A` and A` (original)
    In other words the triplet loss L is:

    L (A, P, N) = L (A`, T, A`)

    Now, let's compute the gradient of the logits with respect to the input image 


    These gradients are used to obtain the adversarial noise as follows :

    noise = noise - step_size * gradients

    According to the assignment, a l2 distance of the embeddings of less than 0.7 indicates that two faces have the same person. So lets do that.


    The distance decreases from 0.862257 to 0.485102 which is considered enough in this case.

    L2 distance between embeddings of attacker and target
    This is impressive because, all this is done while not altering the image visibly just by adding a little calculated noise!


    Also note that the l2 scores indicate that the generated image is more of Kian than Benoit in spite of looking practically identical to Benoit. So there you go, adversarial example generation for FaceNet.


    Sunday, 17 December 2017

    Tensorflow and AEM

    It has been a while since google released Tensorflow support for java. Even though it is still in its infancy, I feel like it has everything we need. Build computation graphs - check, run session and compute stuff - check, GPU support - check. Now if you have all the time in the world to reinvent the wheel, you can pretty much build anything in java that we can build using python or c++.

    So, I have been working on Adobe Experience Manager since I joined Adobe and recently, I started experimenting with several use cases where machine learning can help in content creation and discovery. As I have zero knowledge in building any deep learning models in java, I decided to build everything in java. How hard can it be? Right? Right? Sarcasm aside, as I mentioned earlier, Tensorflow for java has everything we need and as it internally uses JNI we can have interoperability with python and c++ (that's why I preferred this over deeplearning4j).

    First off, I followed their official guide for the setup and had to face a lot of hurdles along the way. In this post I will show you how I managed to successfully setup Tensorflow on AEM (or any felix based systems).

    Step 1

    Add the dependency to your pom.xml file. Note that the scope set to compile.


    Step 2

    Add this configuration to your maven-bundle-plugin.


    Step 3

    Build and install to your AEM instance. Then, navigate to /system/console/bundles/ and look for the bundle which contains the dependency. See if the "Exported Packages" section has the following packages:


    Step 4

    Install JNI if necessary (this is mentioned in the link that I shared earlier).

    Then place the library file in the appropriate place.

    Testing 

    Lets write a simple sling servlet to check if everything is working as expected. Like I told earlier, Tensorflow for java is still in its infancy. So, I wrote a helper class a while back to manipulate the computation graph. Get GraphBuilder.java and place it where it is accessible to the sling servlet.

    GraphBuilder.java


    The following sling servlet includes things like:
    • Creating a computation graph
    • Creating placeholders, constants etc
    • Arithmetic operations, matrix multiplication.
    • Feeding data and computing values of placeholders.


    When you go to /services/tftest you should get something like this:

    4 -2 3 0 FLOAT tensor with shape [3, 3] 14 Testing done!
    Now you can start building any deep learning model on AEM. Also, I will be writing about some of the real life applications of deep learning in content creation and content discovery. So stay tuned!


    Wednesday, 29 March 2017

    Most original prize at The 2017 Deep Learning Hackathon

    Although I have worked on several deep learning projects in the past, I still consider myself to be a newbie in deep learning because of all the new things that keep coming up and it is so hard to keep up with all that. So, I decided to take part in "The 2017 Deep Learning Hackathon" by Deepgram to work on something I have been wanting to do for a while now.

    I built something called Medivh - prophet from Warcraft who has seen the future.  The idea was to build a tool for web developers to predict how users are going to see / use the site even before deploying. Basically, it generates heat maps on websites which show where the user might look at. Example:


    I will write another post with all the technical details. Here is the sneak peak of how it was done.


    Apart from building that, We got an opportunity to interact with people like Bryan Catanzaro - maker of CUDNN and VP at Nvidia,  Jiaji Huangform from Baidu, Jonathan Hseu from Google Brain etc.

    We also got to interact with people from Deepgram and their caffe like framework called Kur which seems pretty good. I think I'll write a review about Kur after playing around with it for some more time.

    Also this:

    This is me presenting before the results.
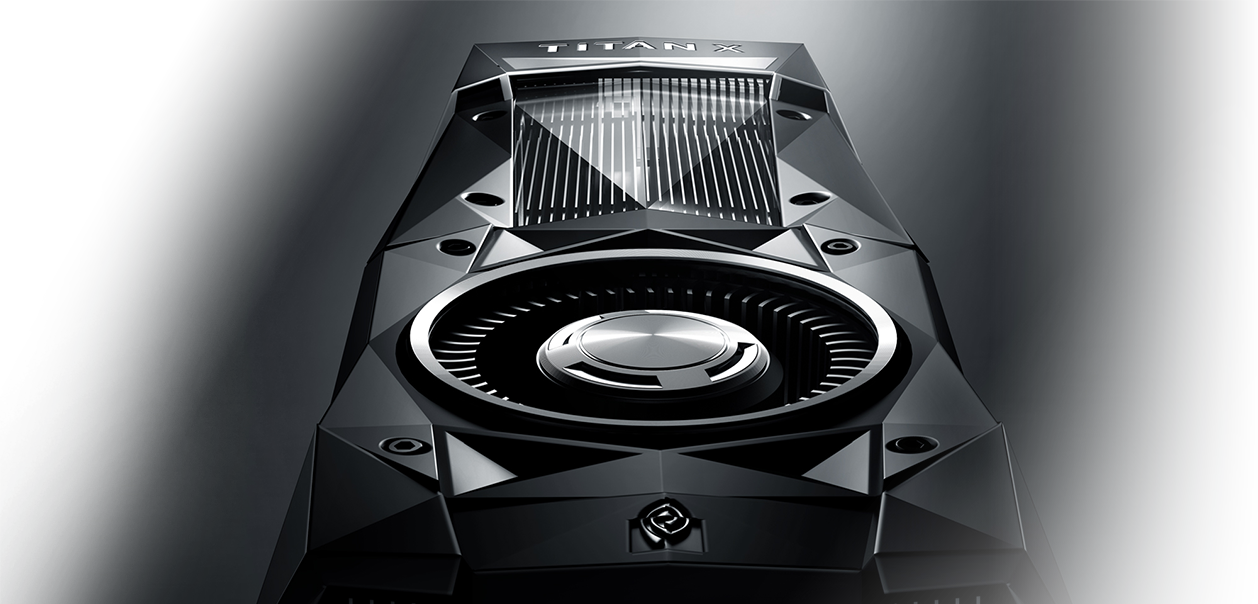
    For Medivh, I won the "Most original prize" -  Nvidia Titan X pascal. What a beauty!


    Thursday, 9 March 2017

    Introducing mailing in crontab-ui

    Now crontab-ui has option to send mails after execution of jobs along with output and errors attached as text files. This internally uses nodemailer and all the options available through nodemailer are available here.

    Defaults


    To change the default transporter and mail config you can modify config/mailconfig.js.
    var transporterStr = 'smtps://user%40gmail.com:password@smtp.gmail.com';
    
    var mailOptions = {
        from: '"Fred Foo 👥" <foo@blurdybloop.com>', // sender address
        to: 'bar@blurdybloop.com, baz@blurdybloop.com', // list of receivers
        subject: 'Job Test#21 Executed ✔', // Subject line
        text: 'Test#21 results attached 🐴', // plaintext body
        html: '<b>Test#21 🐴</b> results attached' // html body
    };

    Troubleshooting


    Make sure that you have node at /usr/local/bin/node else you need to create a softlink like this
    ln -s [location of node] /usr/local/bin/node

    Setting up crontab-ui on raspberry pi

    In this tutorial I will show you how to setup crontab-ui on raspberry pi.

    Step 1

    Find your architecture
    uname -a
    Linux raspberrypi 4.4.50-v7+ #970 SMP Mon Feb 20 19:18:29 GMT 2017 armv7l GNU/Linux
    
    Note that it is ARMv7. Download and extract latest node.
    wget https://nodejs.org/dist/v7.7.2/node-v7.7.2-linux-armv7l.tar.xz
    tar xz node-v7.7.2-linux-armv7l.tar.xz
    sudo mv node-v7.7.2-linux-armv7l /opt/node

    Step 2

    Remove old nodejs if it is already installed and add the latest node to the $PATH
    sudo apt-get purge nodejs
    echo 'export PATH=$PATH:/opt/node/bin' > ~/.bashrc
    source ~/.bashrc

    Step 3

    Install crontab-ui and pm2. And start crontab-ui.
    npm install -g crontab-ui
    npm install -g pm2
    pm2 start crontab-ui
    Now your crontab-ui must be running. Visit http://localhost:8000 on your browser to see if it is working.

    Step 4 (Optional)

    In order to be able access crontab-ui from outside, you have to forward the port 8000. Install nginx and configure.
    sudo apt-get install nginx
    sudo vi /etc/nginx/sites-available/default
    Paste the following lines in the file:
    server {
        listen 8001;
    
        server_name localhost;
    
        location / {
            proxy_pass http://localhost:8000;
        }
    }
    Restart nginx
    sudo service nginx restart
    Now, crontab-ui must be accessible from outside through port 8001. So, to access crontab-ui, go to
    <ip address of pi>:8001
    You can also setup http authentication by following this.
    Thanks!
    Fork me on Github

    Saturday, 28 January 2017

    My solutions to cmdchallenge

    I recently stumbled upon https://cmdchallenge.com which sort of tests your command line knowledge and comfortability. You have to basically solve all the challenges in a single line of bash. It is pretty simple and fun. You should give it a try before checking the solutions.


    hello_world/

    # Print "hello world".
    # Hint: There are many ways to print text on
    # the command line, one way is with the 'echo'
    # command.
    # 
    # Try it below and good luck!
    # 
    
    Solution:
    echo "hello world"

    current_working_directory/

    # Print the current working directory.
    #
    
    Solution:
    pwd

    list_files/

    # List all of the files in the current
    # directory, one file per line.
    #
    
    Solution:
    ls -1

    last_lines/

    # Print the last 5 lines of "access.log".
    # 
    
    Solution:
    tail -5 access.log

    find_string_in_a_file/

    # There is a file named "access.log" in the
    # current working directory. Print all lines
    # in this file that contains the string "GET".
    #
    
    Solution:
    grep GET access.log

    search_for_files_containing_string/

    # Print all files, one per line that contain
    # the string "500".
    # 
    
    Solution:
    grep -rl * -e 500

    search_for_files_by_extension/

    # Print the relative file paths, one path
    # per line for all files that start with
    # "access.log" in the current directory.
    # 
    
    Solution:
    find . -name "access.log*"

    search_for_string_in_files_recursive/

    # Print all matching lines (without the filename
    # or the file path) in all files under the current
    # directory that start with "access.log" that
    # contain the string "500".
    # 
    
    Solution:
    find . -name "access.log*" | xargs grep -h 500

    extract_ip_addresses/

    # Extract all IP addreses from files that
    # that start with "access.log" printing one
    # IP address per line.
    # 
    
    Solution:
    find . -name "access.log*" | xargs grep -Eo '^[^ ]+'

    delete_files/

    # Delete all of the files in this challenge
    # directory including all subdirectories and
    # their contents.
    # 
    
    Solution:
    find . -delete

    count_files/

    # Count the number of files in the current
    # working directory. Print the number of
    # files as a single integer.
    # 
    
    Solution:
    ls | wc -l

    simple_sort/

    # Print the contents of access.log
    # sorted.
    # 
    
    Solution:
    sort access.log

    count_string_in_line/

    # Print the number of lines
    # in access.log that contain the string
    # "GET".
    # 
    
    Solution:
    grep GET access.log | wc -l

    split_on_a_char/

    # The file split-me.txt contains a list of
    # numbers separated by a ';' character.
    # Split the numbers on the ';' character,
    # one number per line.
    # 
    
    Solution:
    cat split-me.txt | sed s/\;/\\n/g

    print_number_sequence/

    # Print the numbers 1 to 100 separated
    # by spaces.
    # 
    
    Solution:
    echo {1..100}

    remove_files_with_extension/

    # There are files in this challenge with
    # different file extensions.
    # Remove all files with the .doc extension
    # recursively in the current working directory.
    #
    
    Solution:
    find . -name "*.doc" -delete

    replace_text_in_files/

    # This challenge has text files that contain
    # the phrase "challenges are difficult". Delete
    # this phrase recursively from all text files.
    # 
    
    Solution:
    find . -name "*.txt" -exec sed -i 's/challenges are difficult//g' {} +

    sum_all_numbers/

    # The file sum-me.txt have a list of numbers,
    # one per line. Print the sum of these numbers.
    #
    
    Solution:
    cat sum-me.txt | xargs | sed -e 's/\ /+/g' | bc

    just_the_files/

    # Print all files in the current directory
    # recursively without the leading directory path.
    # 
    
    Solution:
    find . -type f -printf "%f\n"

    remove_extensions_from_files/

    # Remove the extension from all files in
    # the current directory recursively.
    # 
    
    Solution: (note you cant use find .)
    find `pwd` -type f -exec bash -c 'mv "$1" "${1%.*}"' - '{}' \;

    replace_spaces_in_filenames/

    # The files in this challenge contain spaces.
    # List all of the files in the current
    # directory but replace all spaces with a '.'
    # character.
    # 
    
    Solution:
    find . -type f -printf "%f\n" | xargs -0 -I {} echo {} | tr ' ' '.'

    files_starting_with_a_number/

    # There are a mix of files in this directory
    # that start with letters and numbers. Print
    # the filenames (just the filenames) of all
    # files that start with a number recursively
    # in the current directory.
    # 
    
    Solution:
    find . -name '[0-9]*' -type f -printf "%f\n"

    print_nth_line/

    # Print the 25th line of the file faces.txt
    # 
    
    Solution:
    sed '25q;d' faces.txt

    remove_duplicate_lines/

    # Print the file faces.txt, but only print the first instance of each
    # duplicate line, even if the duplicates don't appear next to each other.
    # 
    
    Solution:
    awk '!seen[$0]++' faces.txt

    corrupted_text/

    # You have a new challenge!
    # The following excerpt from War and Peace is saved to
    # the file 'war_and_peace.txt':
    # 
    # She is betraying us! Russia alone must save Europe.
    # Our gracious sovereign recognizes his high vocation
    # and will be true to it. That is the one thing I have
    # faith in! Our good and wonderful sovereign has to
    # perform the noblest role on earth, and he is so virtuous
    # and noble that God will not forsake him. He will fulfill
    # his vocation and crush the hydra of revolution, which
    # has become more terrible than ever in the person of this
    # murderer and villain!
    # 
    # The file however has been corrupted, there are random '!'
    # marks inserted throughout.  Print the original text.
    # 
    
    Solution: (Found this on hackernews)
    < war_and_peace.txt tr -s '!' | sed 's/!\([a-z]\)/\1/g' | sed 's/!\( [a-z]\)/\1/g' | sed 's/!\.!/./g' | sed 's/ !/ /g'


    Also, you can checkout the creator's solutions here.

    Thursday, 19 January 2017

    Look before you paste from a website to terminal

    Most of the time when we see a code snippet online to do something, we often blindly copy paste it to the terminal. Even the tech savy ones just see it on the website before copy pasting. Here is why you shouldn't do this. Try pasting the following line to your terminal (SFW)

    ls ; clear; echo 'Haha! You gave me access to your computer with sudo!'; echo -ne 'h4cking ## (10%)\r'; sleep 0.3; echo -ne 'h4cking ### (20%)\r'; sleep 0.3; echo -ne 'h4cking ##### (33%)\r'; sleep 0.3; echo -ne 'h4cking ####### (40%)\r'; sleep 0.3; echo -ne 'h4cking ########## (50%)\r'; sleep 0.3; echo -ne 'h4cking ############# (66%)\r'; sleep 0.3; echo -ne 'h4cking ##################### (99%)\r'; sleep 0.3; echo -ne 'h4cking ####################### (100%)\r'; echo -ne '\n'; echo 'Hacking complete.'; echo 'Use GUI interface using visual basic to track my IP'
    ls
    -lat


    It should look something like this once it is pasted onto your terminal.
    View post on imgur.com
    You probably guessed it. There is some malicious code between ls and -lat that is hidden from the user

    Malicious code's color is set to that of the background, it's font size is set to 0, it is moved away from rest of the code and it is made un-selectable (that blue color thing doesn't reveal it); to make sure that it works in all possible OSes, browsers and screen sizes.


    This can be worse. If the code snippet had a command with sudo for instance, the malicious code will have sudo access too. Or, it can silently install a keylogger on your machine; possibilities are endless. So, the lesson here is, make sure that you paste code snippets from untrusted sources onto a text editor before executing it.

    Thanks for reading!

    Tuesday, 18 October 2016

    How to download large folders on dropbox

    Recently, someone shared a large folder with me and when I tried to download it, I was getting an error; "There was an error downloading your file".
    This error seemed very vague and after a quick search online, I figured out that it is not possible to download folders which are bigger than 1 GB.  And according to dropbox's help article, I will be able to download it only if I add it to my dropbox. With dropbox's puny 2GB free storage it was not possible and I was not ready to spend $$$ just for this. 
    So, I wrote a simple script in javascript that I can run it on browser console to download all files in a folder!

    How to do it?


    Step 1. Navigate to the dropbox folder on the browser and open your developer console. Press   cmd + j  on mac or  ctrl + shift + j  on linux and windows.

    Step 2. Paste the following code in the console.


    Step 3. The browser will try to block the windows trying to download it. Select the option to  Always allow pop-ups from https://www.dropbox.com . For instance this is how it will look on Google Chrome (you have to click on right most icon in the search bar).


    Step 4. Your files will be downloaded one by one!

    NOTE: If any folder inside the folder is greater than 1GB in size, then you may have to do the same process after navigating to that folder in the browser.

    Update: Make sure that you use the list view to see files by clicking on this:

    Thursday, 15 September 2016

    Right way to set env variable while exec or execFile in nodejs

    According to the official documentation, exec allows you to pass additional environment variables as part of options like this:

    This looks fine right? except that it totally isn't! By passing "env" as an option, you are not adding on to existing environment variables, but you are replacing it.  This is not clear from the documentation and can leave you scratching your head for a while as it can seem to break the command for no particular reason at all! So, you need to essentially make a copy of process.env and modify it like follows.


    Thanks for stopping by!

    Thursday, 28 April 2016

    Problem with clipboard on Ubuntu

    Clipboard on Ubuntu is "broken". Well, maybe not. But copy-paste is broken in a lot of applications on Ubuntu. Let me give you an example,

    • Open LibreOffice.
    • Write something and copy it.
    • Paste it somewhere else. It works as expected.
    • Now close LibreOffice and try pasting. It won't work.
    This is a well known bug - Copy-Paste doesn't work if the source is closed before the paste; affecting a lot of applications on Ubuntu. And they are not so keen on fixing it, atleast not any time soon.
    The reason for this is that these applications do not comply with the clipboard specification from FreeDesktop
    If a client needs to exit while owning the CLIPBOARD selection, it should request the clipboard manager to take over the ownership of the clipboard, using the SAVE_TARGETS mechanism. If there is no clipboard manager, or if the SAVE_TARGETS conversion fails, the application should simply exit.
    Applications need to transfer ownership of the clipboard to clipboard manager before exiting for copied data to perisist after it exits. There is certainly nothing you can do about it, unless offcourse you are willing to modify the source code of each of these applications to make it comply to FreeDesktop specs.

    Fix. Well.. workaround.

    The reporter/ moderator of the bug report suggests that we should install diodon, klipper, glipper, parcellite or xfce4-clipman as a workaround for this issue.
    Working of diodon


    Tuesday, 26 April 2016

    Ubuntu 16.04 won't wake up from suspend

    I recently installed Ubuntu 16.04 LTS Xenial Xerus on my Thinkpad E550. I honestly regretted it not just because it doesn't support AMD proprietary fglrx driver aka AMD Catalyst or AMD Radeon Software but because the suspend feature stopped working.

    I initially thought that this had something to do with video drivers that I had installed on Ubuntu 15.10 which were now incompatible with 16.04. I realized that this was not the case as the issue persisted even on opensource drivers that it is compatible with.

    Also on a closer observation I realized that it was not that my system was not able to wake up from suspend, but that it was not able to suspend at all. On suspending, the screen would go off but my laptop kept running, heating up and draining battery. This problem existed when I hibernate or shutdown as well.

    Now the only possible reason for this is some problem in acpi which is not letting my system to suspend. Ubuntu 16.04 is shipped with kernel 4.4. A quick search on this issue on kernel 4.4 made me realize that this exists across several destros and mostly on thinkpads. So I upgraded to kernel 4.5 and the problem is resolved.

    Installing kernel 4.5

    32 bit

    64bit

    Then reboot!

    Friday, 8 January 2016

    Parsing wav file in node.js

    I have worked with wav audio data in python before. Scipy provides a very nice way to do this using scipy.io.wavfile


    I wanted to do exactly the same in node.js. There is a module called wav which sort of does it. However I faced several problems.

    1. The Reader() method reads the file stream and converts into chunks of Buffer. This is very good while building web apps as you can send chunks of data separately and combine it later. However, I was just writing a script that'd run offline, So I had to put all the buffers to an array and then use the concat method of Buffer.


    2. The wav module doesn't do much processing and just throws the raw binary information at us. So, we have to take care of

    • Combining hex data to get amplitudes - One frame can be represented using several blocks of 8-bit hex. The number of blocks per frame is got using blockAlign parameter in the format.
    • Endianness - Data may or may not be  in little endian format. So, while reading the blocks of hex data, we have to take care of this.
    • Handling negative amplitudes - Frames spanning several blocks when negative can be little challenging to handle as they are just stored as their two's complement.
    • Separating channels - The raw binary contains data of all the channels together. Fortunately, they are mentioned one after the other. Using channels parameter in the format, channels can be separated easily.
    So, let's see how I handled all the above cases. First, we need to capture the "format" of the audio file that contains information about the file.


    Then, on "end" event i.e after all the chunks have been combined, we will handle all the cases mentioned above as follows


    Concluding, in this article I showed you how to handle and parse wav files in node.js by resolving several problems such as merging chunks of Buffer, combining hex data to get amplitudes, endianness, handling negative amplitudes and separating channels.

    Wednesday, 23 December 2015

    Unfortunately the process com.android.phone has stopped in CM 13

    I have a good old nexus 4 still trying to keep up with the big boys in the market. After google ditched the plans of releasing the latest android 6.0 - Marshmallow for nexus 4, things didn't look so great. But with the release of CM 13 (mako), even nexus 4 has android 6.0! Previously, I was running CM 12.1 and I dirty flashed CM 13 on top of it. Although it doesn't have all the features that CM 12 had, with time, the awesome guys in XDA and cyanogen will port all the features to CM 13.

    After dirty flashing CM 13 on top of CM 12.1, I faced some problems. First of all, things were kinda slow. So I went to Developer options in Settings and set all the Animation scaling to .5x. This considerable made things faster. Secondly and more importantly, my sim card was not getting detected and I was getting a ton loads of popups saying "Unfortunately the process com.android.phone has stopped".


    I looked at the logcat to see what is going wrong and I found that this was appearing a lot of times.


    Clearly, the problem was with com.android.providers.telephony. Upon looking closely, the problem was related to CursorWindow and Cursor. Hence, the problem was not with CM 13 but with the old database left behind by CM 12.1. 

    Solution


    Just delete the folders /data/data/com.android.providers.telephony and /data/data/com.android.phone using some tool like Root Explorer or you can do this in adb shell.

    rm -rf /data/data/com.android.providers.telephony
    rm -rf /data/data/com.android.phone

    Then, restart the phone.

    Tuesday, 27 October 2015

    USB debugging toggle widget

    Like I told you few days back in this post, I made a widget for android to toggle USB Debugging - ADB (Android Debug Bridge). Today, I will tell you more about it.


    There are many alternatives to this. However they either require you to make the app a system app or they simply open the settings page. As this was not exactly what I wanted, I made one myself that allows me to enable/ disable USB debugging on click. You can get the app from here.

    Download ADB Toggle

    Fork me on Github


    You DON'T have to make this a system app!.


    Sunday, 25 October 2015

    Using WRITE_SECURE_SETTINGS permission on non system apps

    I happen to frequently use an app that doesn't work if USB Debugging - ADB (Android Debug Bridge) is enabled. It is very cumbersome to go to settings and enable or disable the setting every time I need to use the app.
    I checked if there are any widgets that could do this in a click and returned empty handed. So, I did what every developer would do - build it myself!

    In order to change the adb settings, I had to use WRITE_SECURE_SETTINGS permission. But there was one major problem! This permission is not available for non system apps!!

    The easiest solution to this was to move the apk to /system partition. Except that I didn't want to do this as I frequently keep flashing /system partition.

    Another solution was to use pm and grant permission to the app like this:

    adb pm grant <package name> android.permission.WRITE_SECURE_SETTINGS

    This was great! However I didn't want users who were gonna use the app to go through all this pain. I had to figure out a way to do the same programmatically. So I did the next best thing! To run the command after opening a root shell in the code.

    Here is how I did it.
    This requires root. But that's ok.